 Windows Live Writer is a brilliant blog authoring tool [detailed review] with a WYSIWYG Rich text editor and support for plugins. And here are two excellent features hidden in the Live Writer Preferences window that are very useful but you may not have explored them yet:
Automatic Blog Ping via Windows Live Writer
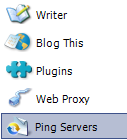
Every time you publish a post on your blog using Windows Live Writer, the software can send a ping XML-RPC signal to ping servers like weblogs.com, blo.gs, ping-o-matic or any custom ping service.
Select Tools->Preferences->Ping Servers. Type the list of ping servers that you would want Live Writer to inform when you create a new post for your blog.

Write your own HTML Snippets for Blog It
Windows Live Toolbar has a "Blog This" button that lets you compose a new post from your current HTML webpage. Pushing the "blog it" opens the selected text and images including the source URL inside Live Writer preserving all the formatting and layout details. This is a great feature for quick blogging but there's more to it.
 Windows Live Writer also lets you customize this HTML information that it receives from the IE Window when the blogger presses the Blog It button. For instance, you want to add a disclaimer text or your HTML signature to every item that you blog using the BlogThis button. Or say you are blogging a photograph and want the original image link to open in a new window rather than in the same window.
Select Tools->Preferences->Blog This. Now select Link, Image or Snippet from the Content box and click "Customize HTML". You will see a text box prepopulated with some code which is very easy to understand and there are even hints at the bottom. You can either write your own HTML template code, append the existing code logic or simply delete the entire text which won't fill-in (or credit) the original story in your blog post.
