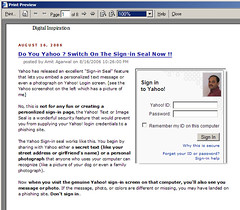
 Based on reader feedback, we have now added a "Print this Document" button (or hyperlink) to all our blog pages that converts the current webpage into a printer friendly format and sends it to your printer for printing. To see an example of how the final print version of the page would look like, either click this link [Print Page] or select File->Print Preview from your browser menu bar.
 You will notice that the print version of the page is stripped of all the bells-n-whistles like the header graphics, sidebar text, footer information, language translation flags, search box and the comments saving your expensive printer ink and pages. Only web images that are part of the blog post are printed in the final document and rest all the fancy items of the page are omitted.
Now if you are looking to add a similar feature in your blog, here's a simple step-by-step tutorial on how to do it. The trick involves some bit of CSS/Javascript and should work across all blogging platforms (Wordpress, Blogger) and personal homepages (like Geocities or Googlepages) where the owner has access to the website layout template.
Step 1: Add the following line to your blog template inside the <head> tag (copy-paste should work)
<style type="text/css" media="print">Step 2: Identify all the areas (or HTML elements) in your blog template that you want to hide in the printer friendly version, ie the sections that you don't want to appear in the print copy. Enclose them under <span class="noprint">..</span> tags. I will show you an example below:
#noprint {display: none;}
// Hide unwanted elements
body {background:fff; color:000;}
// Black text on White background
a {text-decoration: underline; color:00f;}
//Underline Hyperlinks in blue
}
</style>
Lets say our HTML is something like:
<h1>Our story</h1>Now in the print version, suppose you want to hide the H1 header and the image. So we will just enclose them inside the span tags like below:
<p>this is a para element one</p>
<img src="abc.jpg" />
<p>this is another para</p><br />
<span class="noprint"><h1>Our story</h1></span>This is just an example, you can enlose the entire div elements to hide big blocks of content.
<p>this is a para element one</p>
<span class="noprint"><img src="abc.jpg" /></span>
<p>this is another para</p><br />
Step 3: We are almost done, your site visitors won't see the extra luggage when they print your blog posts. If you also want to add a "Print this page" button your blog, add the following HTML snippent anywhere on the page.
<a href="javascript:window.print()">Print Page</a>Remember that the above creates a printer friendly version only in memory and directly submits it to the printer. The user is not able to see the electronic version of the print version unless he prints it to PDF using Acrobat or other PDF creation tools.
If you want to build a functionality like The New York Times or Wall Street Journal paper where readers have an option to convert any HTML page into a text only version which can then either be printed or saved an HTML text file for offline reading, stay tuned for the next part of this tutorial. It involves HTML forms and query parameters.
Related Hacks: How to Reduce Printing Cost of Web Pages, Handling CSS Images in Blogger Templates
